Showing posts with label crafts. Show all posts

Sunday, January 20, 2013

DIMyself Spaghetti T-Shirt Scarf


When it’s cold and snowy outside (like today), we’re stuck looking for something to keep the kids occupied in the house. And, since I can only handle so much time watching talking animal movies (and by “so much” I mean NONE) I was forced to find something else for the kiddos to do.

A while ago I was perusing Pinterest and came across a blog with lots of ideas for things made out of old t-shirts. BINGO! Easy, fast, & made from materials we already have in the house, (You can find the original post here.)

So, here’s our Spaghetti T-shirt scarf:

Materials & tools:


An Old T-shirt

Scissors & tape measure


Instructions:
First, we cut off the bottom seam & cut under the armpits.


Then we measured, and cut, strips about 1 1/2in wide.

Here are the strips we cut

Next, we stretched.
(SN: I think we stretched it out too far. Next time I won’t stretch the loops as much.)

Last, I cut the bottom seam and wrapped it around the loops to hold them together.
Tie a knot to secure it. (For extra hold, I secured it with a safety pin.)


Ta-Da!

Can’t let the excess go to waste!

The loops were a little long, so we doubled the scarf and it was the perfect size for the princesses.

Again, this was a project that took less than half an hour to complete. It probably would’ve taken less, but I couldn’t find my fabric shears and made do with what I could find. The project shown was done a couple weeks ago, but we’ll be doing it again today so the princesses will have scarves to match Mommy’s. Happy Styling!


Tuesday, January 8, 2013

10 Things to Accomplish in 2013


Goals for Me in 2013

  1. Learn how to make more Laotian food. (My poor Hubbs--married an Asian girl, eats lots of hot dogs, lol!)
  2. Set up (and stick to) a workable writing schedule.
  3. Craft more -- especially painting & jewelry making.
  4. Be mindful of the words that come out of my mouth (and my keyboard).
  5. Lose the weight. (Yes, it’s there every year. One of these times it’s going to happen, I swear!)
  6. Learn to: mud drywall, lay tile & carpet, install trim/moulding, and use a lot of the Hubbs’s power tools.
  7. Read to the kids every possible night.
  8. Make time for my friends. (Including have an actual conversation with at least one person a day.)
  9. Make time for Date Night.
  10. Make time for myself. (Including attending at least ONE writer’s conference!)


A lot of these are things that I try to do every year (like lose the dang weight--ugh.) But, I’d like to think I’m older, more mature, and just in a better place to reach my goals this year. Wish me luck!

What have you got planned for this year?


Wednesday, December 12, 2012

DIMyself: Ice Cream Cone Christmas Trees


Sunday the kiddos and I decorated “Christmas Tree” Ice Cream Cones. I’ve seen them all over the internet and being repinned like crazy on Pinterest. Every year, we try decorating a gingerbread house, and every year it looks like crap. I’ve never made gingerbread, so I always buy a kit, thinking it’s going to be easier.

Who am I kidding?

I have tiny kids, they can’t construct something with “icing” glue. They can barely construct something with actual glue.

I figured ice cream cones would be doable, since the project was basically like decorating a 3D cookie. (Decorating sugar cookies is something we do often in our house.) All in all, I would say the project was a success. Of course, Small’s tree looked like all the bottles of sprinkles exploded on it, but she was happy with it, and that’s all that matters.

ICE CREAM CONE CHRISTMAS TREES

This was my tree. I'm very proud of it. :)

Ingredients:


Icing--I used a basic sugar cookie icing recipe:
4 cups powdered sugar
3 Tbsps butter, softened
1 tsp Vanilla
Milk
Green Food Coloring.

*Cream together the powdered sugar and butter, stir in the Vanilla and then add enough milk to make the consistency you want. For this project, I left it a little thicker so that the candies would stick & the icing would harden a little when done.
*Then stir in the food coloring. I used about 20 drops (I wanted very green trees.)
*Note: Since we only did 3 trees, there was lots of icing left over for cookies. :)


Sugar Cones
Assorted Candies for decorating--
We used Mini M&Ms
Twizzler Pull & Peel licorice
Girl Scouts Gummi Berries
& some random Christmas themed sprinkles & sugars I always have on hand.

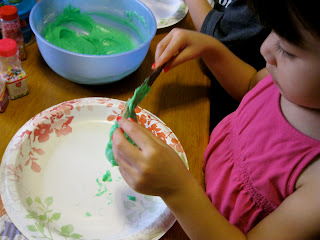
First: We slathered icing all over the sugar cones.


Second: We added sprinkles and candies to our hearts’ delight.


Third: We ate.


The decorating only took about 30 min after the frosting and other ingredients were assembled. Which is great for short attention spans. This is definitely a project we’ll be doing until the girls are old enough (read: coordinated enough) to attempt gingerbread houses again. Heck, we might even do it again yet this Christmas!

Have a Merry (and tasty) Christmas!


Related Posts Plugin for WordPress, Blogger...